Adventures in Portrait Painting

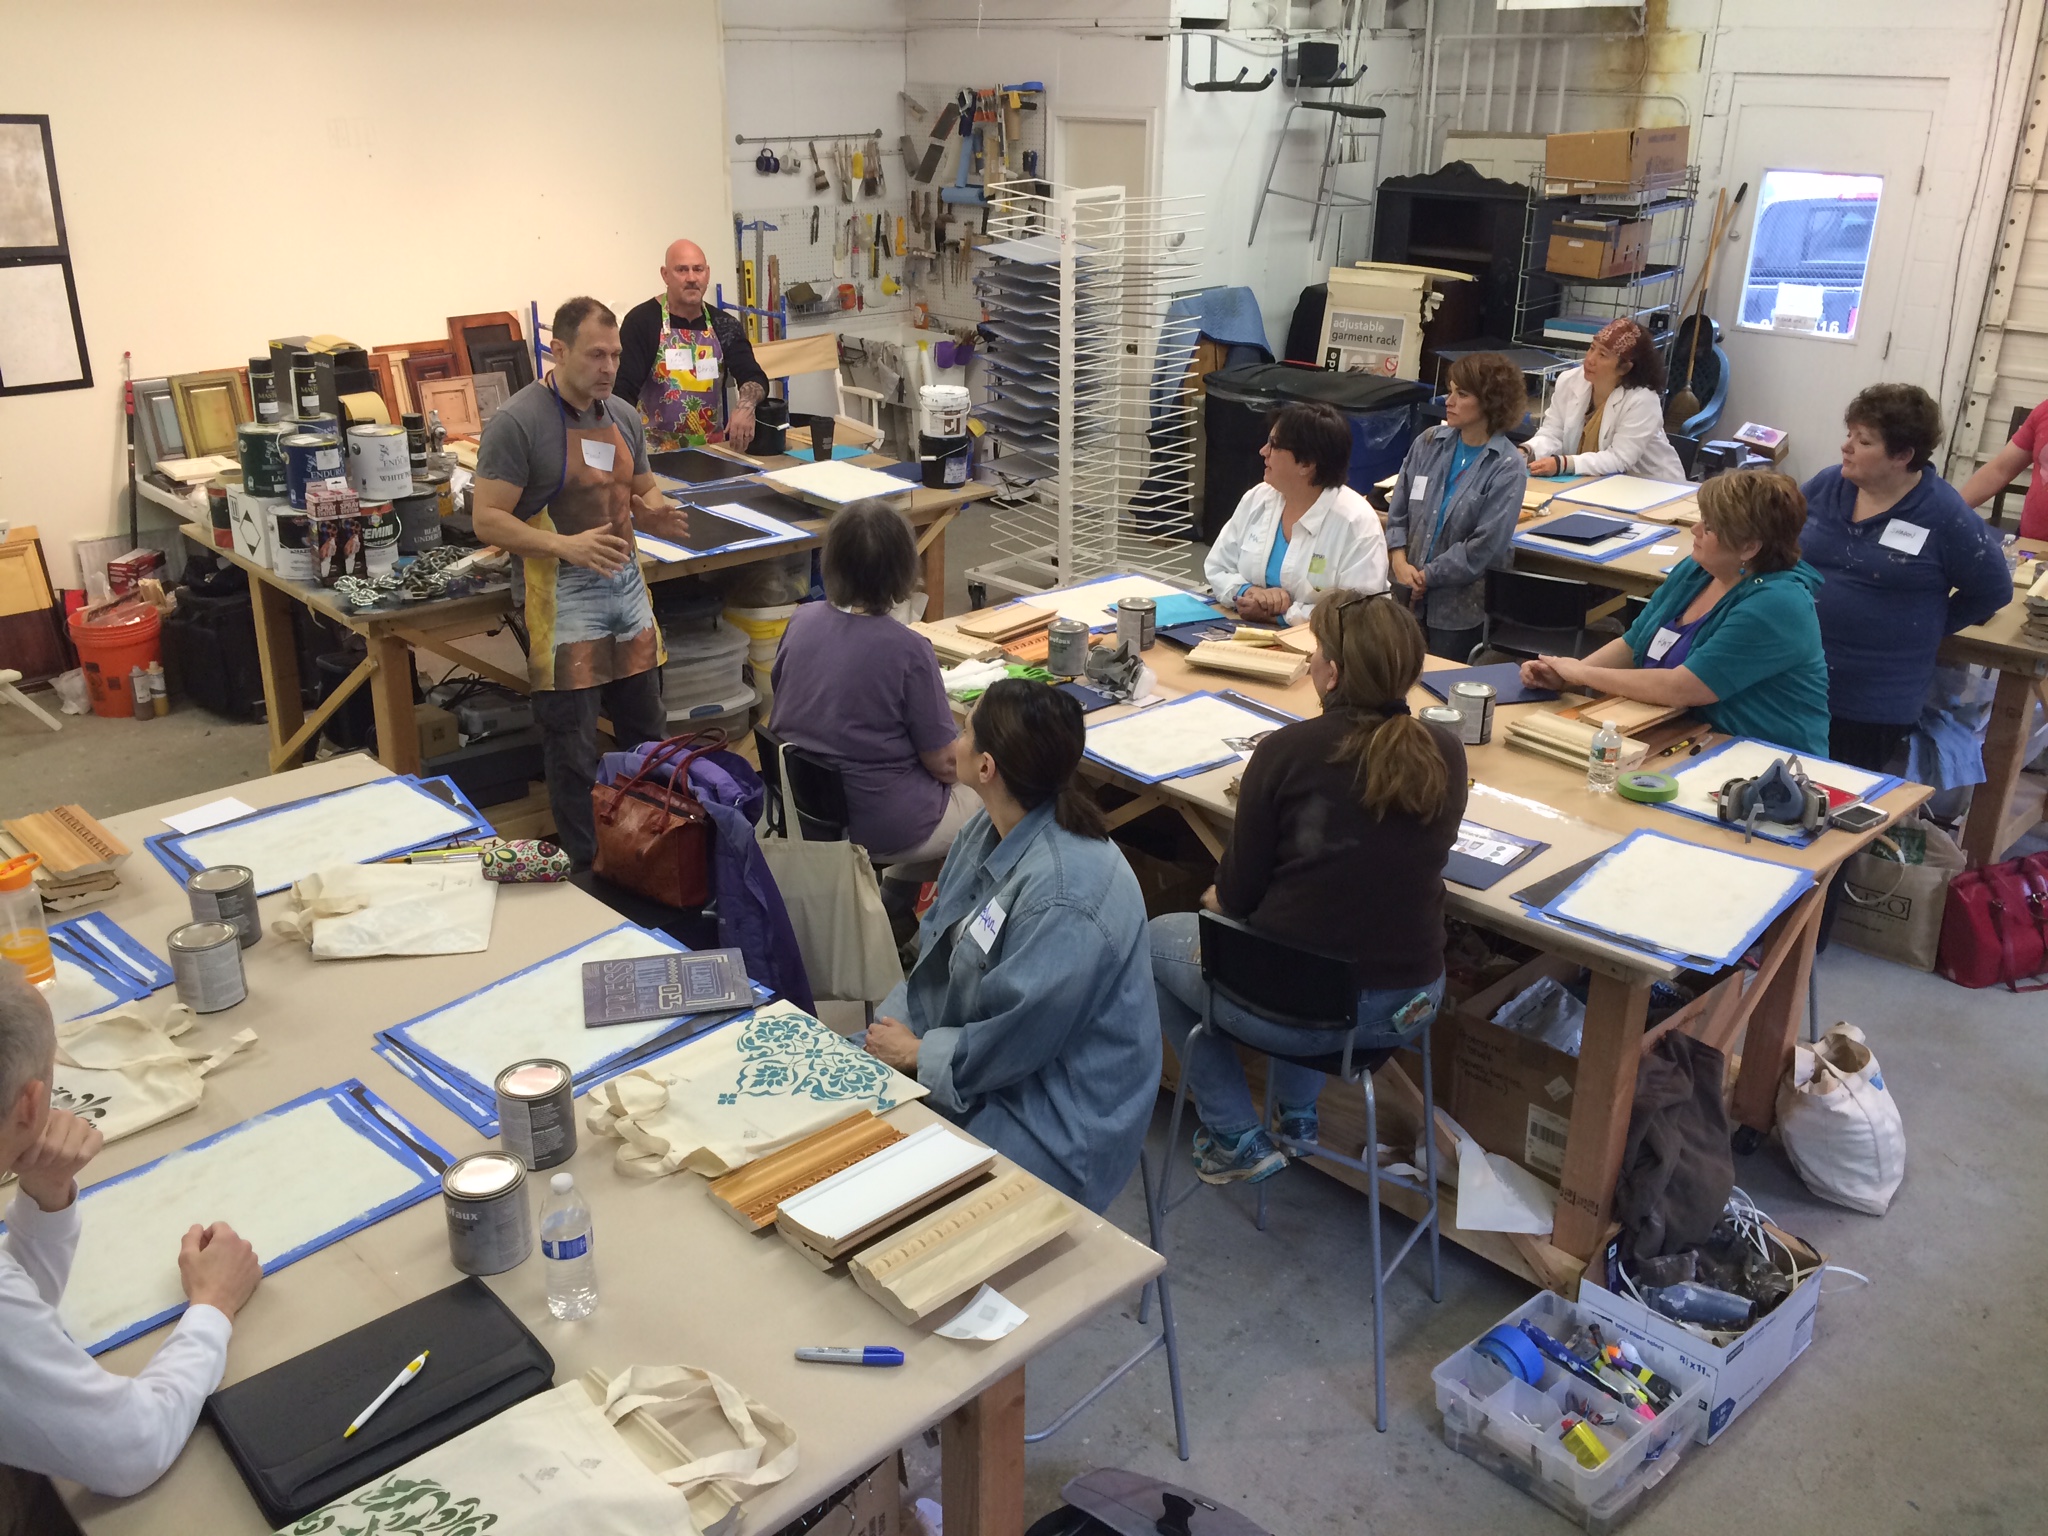
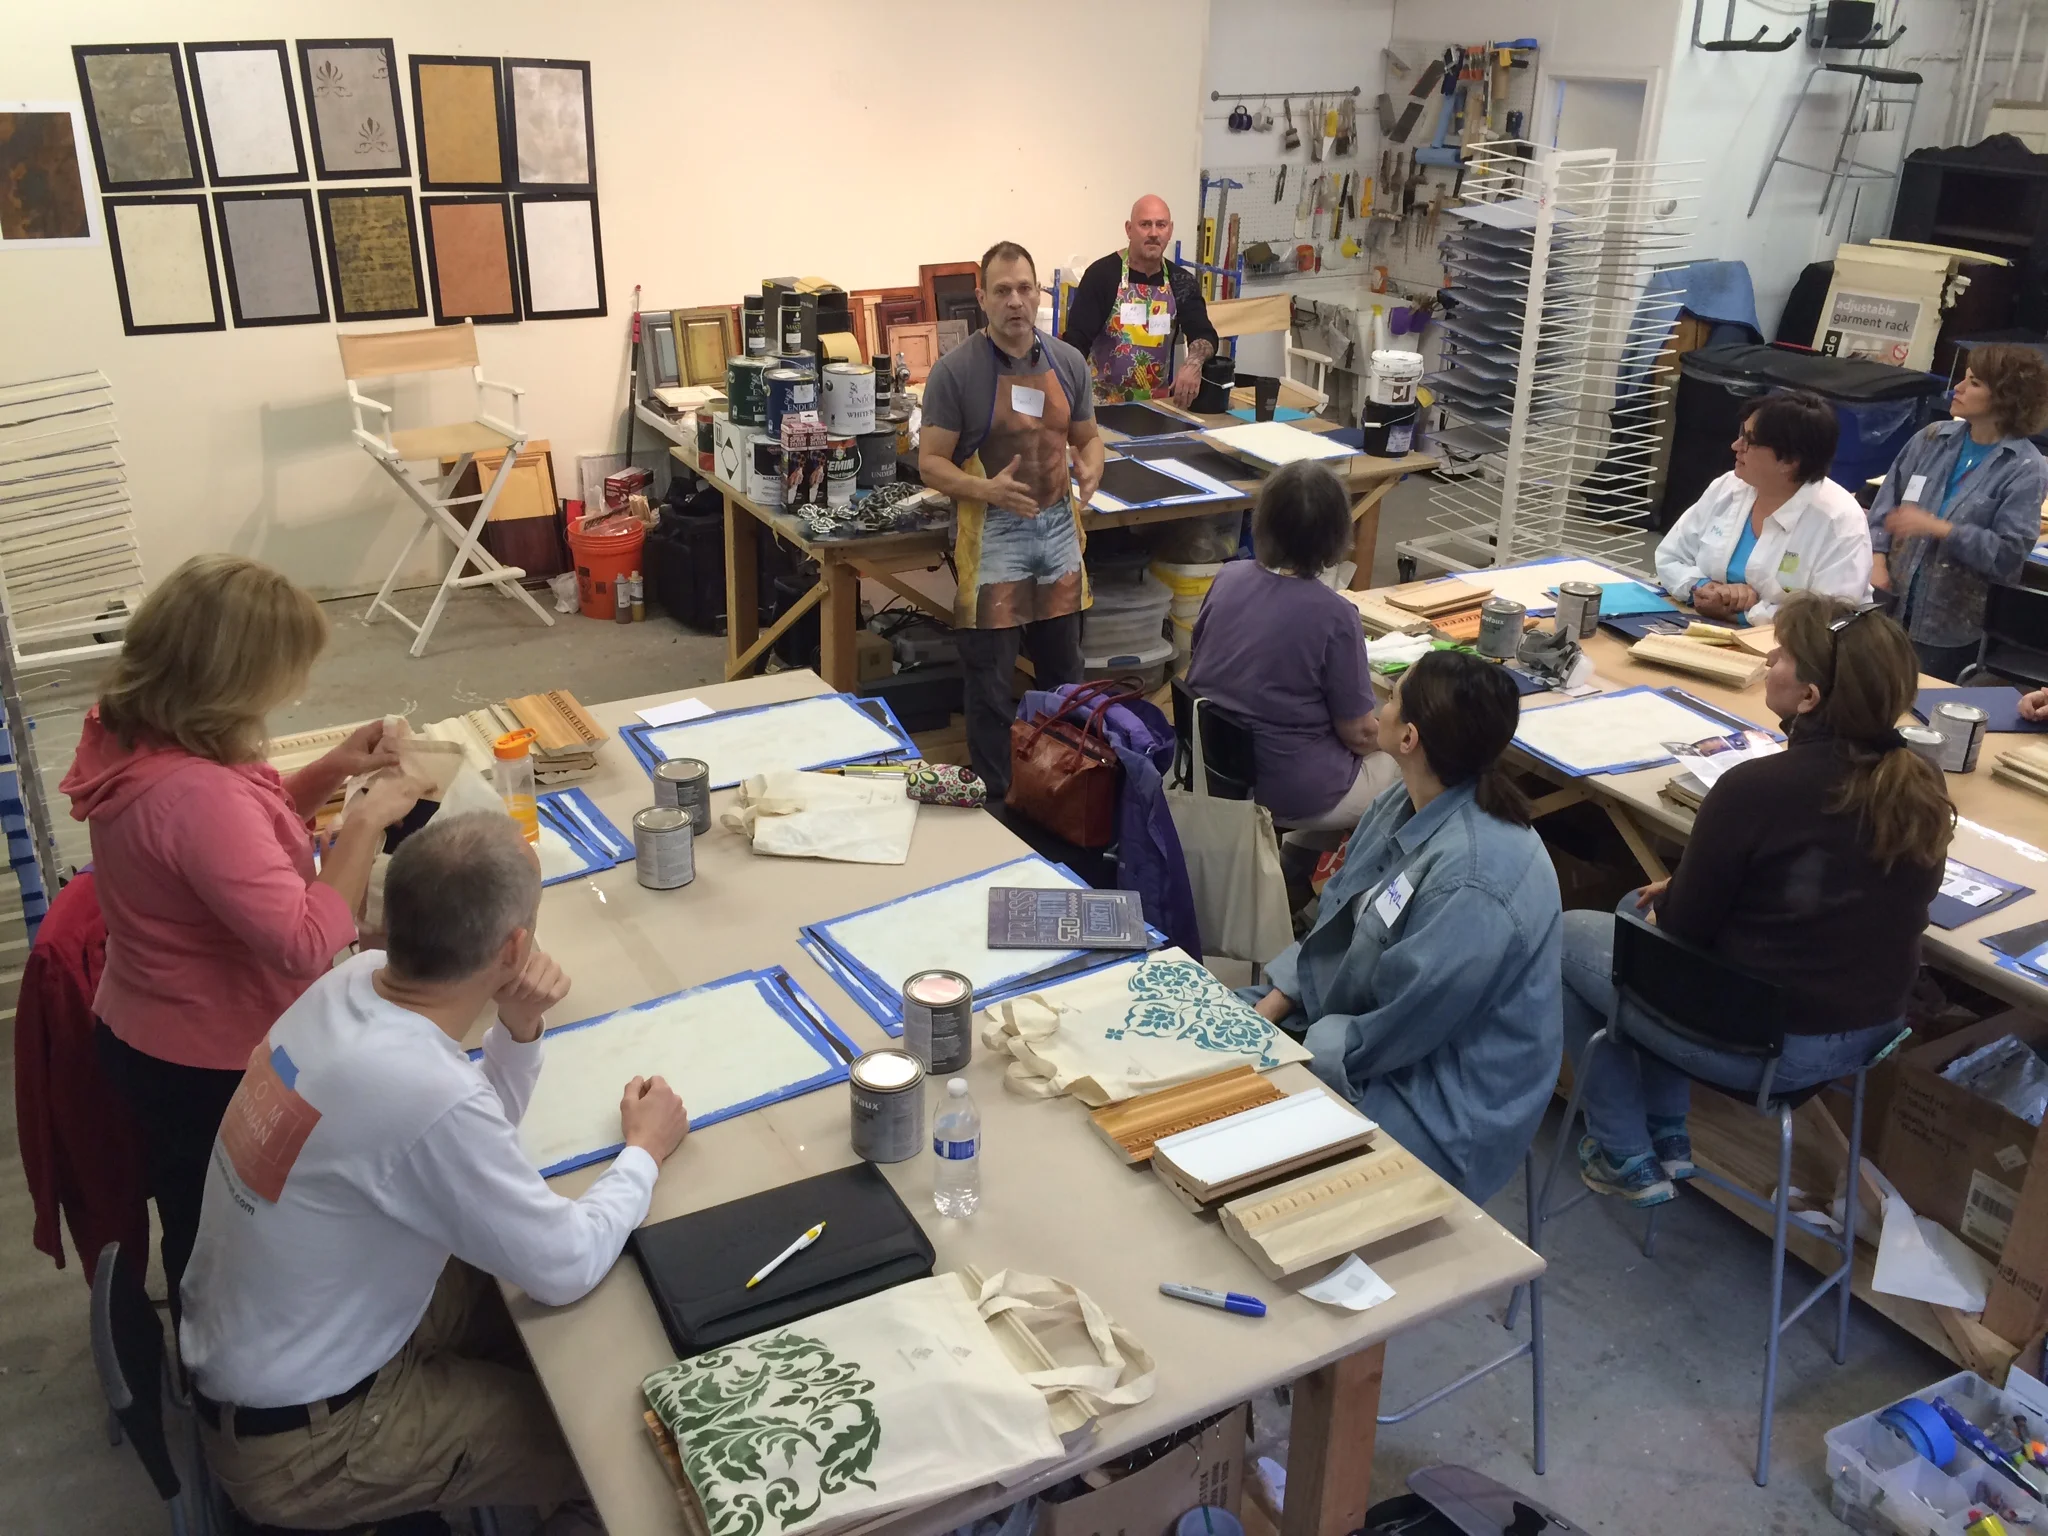
Taking classes to continue my personal artistic growth is something I always love doing but finding the time (and money) is difficult. Last month I took the third class offered in William Cochran's Trompe L'oeil Mastery Program- Portraiture. Each time I take a class with William I find that take away something that doesn't present itself until later. The immediate return is usually that I suck and I should hang up my brushes. However, after a few weeks the information absorbed at the time somehow begins to come together. Our first day was revisiting color theory. Elementary as it may seem, there are hundreds of pigments and we each chose a palette to work from. My colors were Hansa Yellow Opaque, Phthalo Blue Green Shade, and Pyrrole Red Dark. Adjusting for the intensity of the pigments, we each created a value scale moving through each color as well as across the wheel through neutral grey. Once complete, we began the portrait workshop in earnest.

IMG_2428

IMG_2428

IMG_2430

IMG_2430

We worked from a live model as well as a photograph. This was extremely difficult. Ideally the model would be present the entire time, but that isn't practical. We began with setting up the backdrop and her attire, changing things based on how they reflected against her skin and hair. Once we settled on the look we shot a series of photos. This whole process took an entire day. The photography process could be a class in and of itself because there is so much to understand like lenses, lighting, distance, etc.

CochranStudioPortraitDee

CochranStudioPortraitDee

IMG_2461

IMG_2461

IMG_2455

IMG_2455

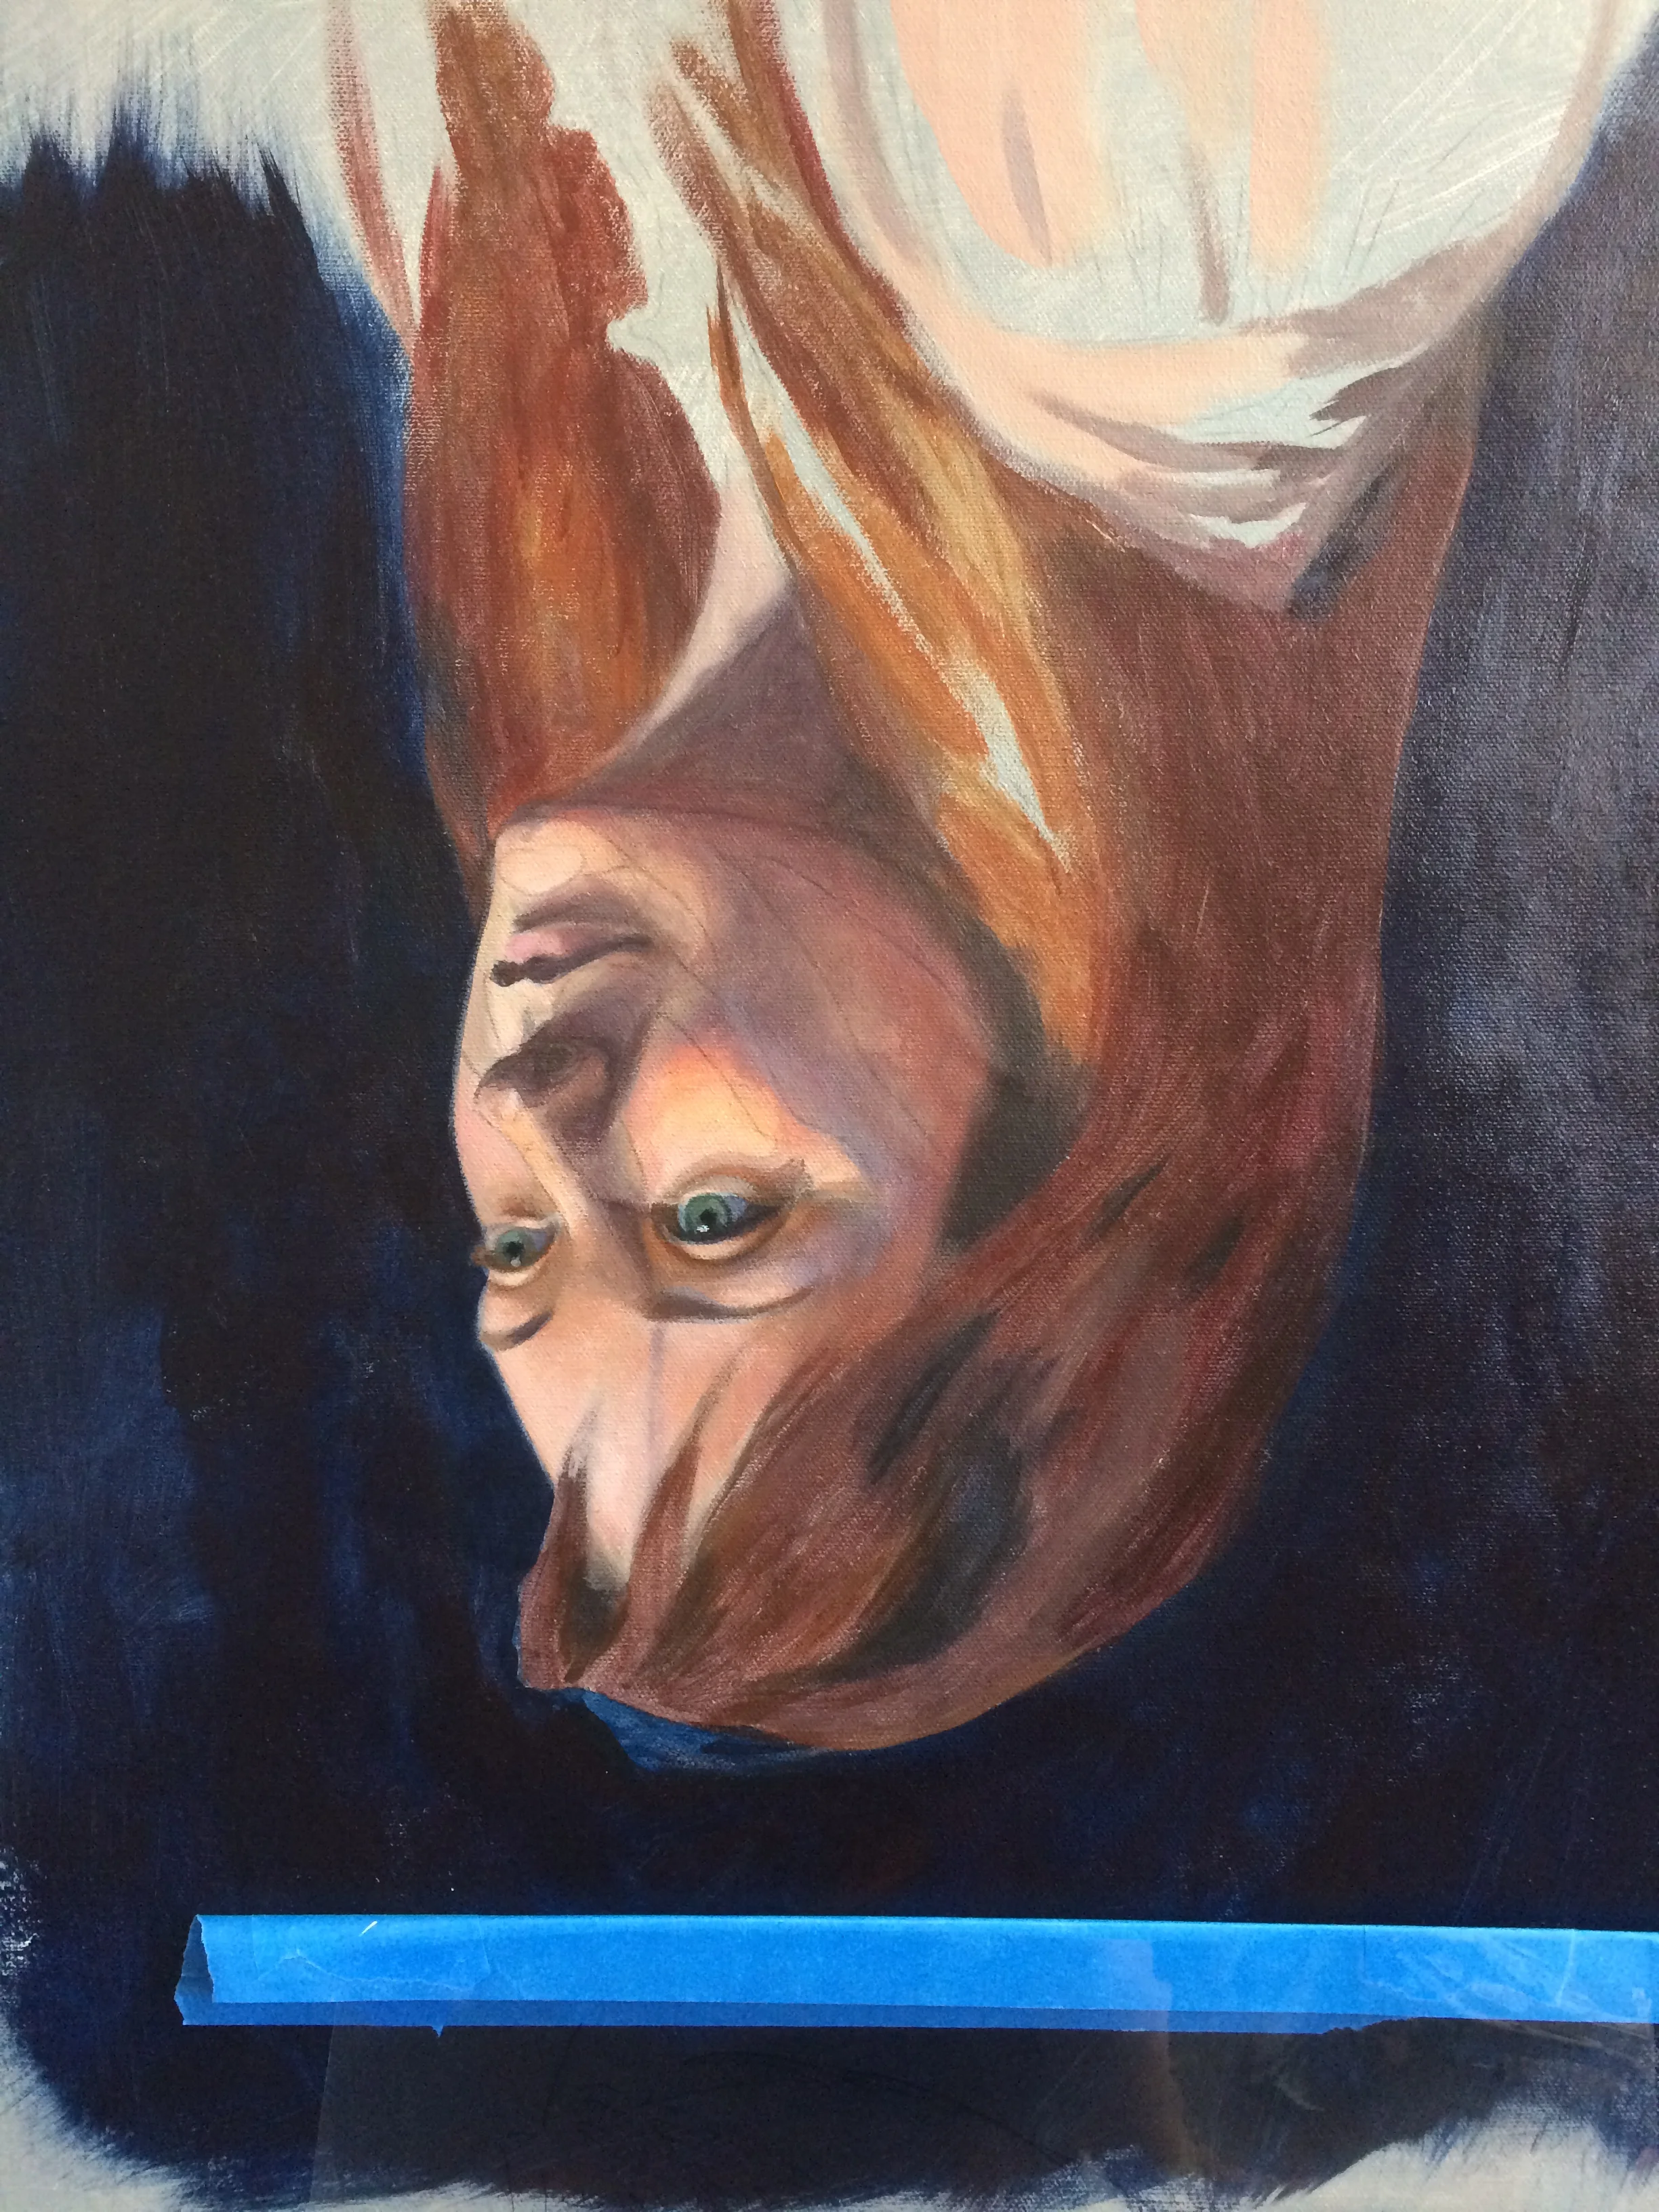
The difficulty in this class was having to move from the photograph to the model when she was present. In the photograph the values and temperatures were completely different. In real life these things were much clearer and more vibrant if you really studied her. In starting out I did my usual thing of blending tiny brush strokes and by the end of the first day it had no dimension. Up close, yes, but when you stepped back everything collapsed. So I began round two and finally hit my stride. I stood back at arms length with a long handled paint brush and contemplated each stroke of color. This also made it easier to paint with the type of paints we were using; Golden's Heavy Bodied Acrylics. I'm used to using Golden's Proceed line of mural paints which have a much longer open time and are less opaque, thus requiring a different method of application- multiple translucent layers.

IMG_2435

IMG_2435

IMG_2436

IMG_2436

IMG_2441

IMG_2441

Painting skin is a whole different ballgame than painting other surfaces. There is a luminosity and depth that is hard to achieve. The tricky part is capturing the subtle temperatures of the values; warm darks, clear and vibrant midtones, cool lights. And this can all change depending on the lighting. I spent more time looking and studying than I did putting paint on the canvas. I hope with practice I'll be able to identify these types of things more efficiently.

IMG_2465

IMG_2465

I am usually a fast painter and I think that I should have stopped while I was ahead but having about a day and a half left I continued to tinker with it. Which is fine because no one is paying me for this! I switched over to Golden's Open Acrylics which are similar to the Proceeds but have a heavier body like their regular line. This allowed me to blend a bit more and smooth out some values. But stepping back again, things began to fall flat. I wasn't worried as much this time because I felt I had gotten what I wanted from the exercise.

IMG_2656

IMG_2656

My dear friend Jeanne stayed with me during the week and we had amazing philosophical discussions about art and life. Jeanne and I met while working for William on his project, The Dreaming, in Downtown Frederick, MD in 2006.  She came up a few summers ago to help with the Extreme Makeover Project I was involved in. Jeanne is a free spirit, full of energy, extremely talented, and I wish she lived closer.

IMG_2473

IMG_2473

On Saturday after the class, Jeanne and I headed down to DC to visit the National Portrait Gallery. Its a shame that I live so close to such amazing museums and I've never been to this one. We spent the day there, seeing as much as we could. With new eyes, I was able to really study the brush strokes and color. Some of my most favorite are below.

IMG_2505

IMG_2505

IMG_2511

IMG_2511

IMG_2492

IMG_2492

IMG_2539

IMG_2539

IMG_2519

IMG_2519

IMG_2533

IMG_2533

IMG_2537

IMG_2537

IMG_2513

IMG_2513

IMG_2514

IMG_2514

IMG_2498

IMG_2498

Aaaaaaannnnnnd..........done.

IMG_2546

IMG_2546

The Faux Team Class Recap

We had a BLAST this past weekend at the studio! Henri Menendez and Chris Burke, aka the "Faux Team" hit it hard with their expertise on cabinet refinishing and faux finishing work. We learned about how to apply professional finishes to cabinetry and furniture and Firenze Plasters. A lot of knowledge was shared and students came all the way from Upstate New York, Connecticut, New Jersey, Pennsylvania, Maryland, Virginia, North Carolina....and TAIWAN!! Thanks to everyone for making it out, I hope you enjoyed Ellicott City and can't wait to come back! To find out about upcoming classes, be sure to sign up for our newsletter!

IMG_0009

IMG_0009

IMG_0008

IMG_0008

IMG_0007

IMG_0007

IMG_0006

IMG_0006

IMG_0005

IMG_0005

IMG_0004

IMG_0004

IMG_0003

IMG_0003

faux team group class

faux team group class

Getting Back My Mojo

IMG_1517

IMG_1517

As promised, I am posting some shots of the progress on my first "for-me" painting. I'm really excited an have gotten some good feedback on Facebook and in person.

IMG_1528

IMG_1528

IMG_1613

IMG_1613

IMG_1616

IMG_1616

Here it is today. Still have a bit to go, haven't touched the foreground yet. The lower portion of the window and the chairs are still incomplete.  Moving along though and it feels great. I'm tossing around a few ideas on a name but am open to suggestions. Thoughts?

IMG_1680

IMG_1680

Also, in the studio, my good friend and fellow artist Stacey Olson Sachs has me working on one of her commissions. We are learning a lot from one another. I helped achieve the effect for the background using a parchment type glazing treatment as well as the map and gradation of the blue sky that fades out. In exchange, I am learning to "see" more than what actually in a reference photo. I am earning my Artistic License!

IMG_1642

IMG_1642

I will be helping install this first half coming up on Friday. There will be a second part to this leading in from the left that will tell the story of people in West Africa contracting the parasitic disease known as Shistosomiasis.  Biomedical Research Institute does research for this disease and harvests affected snails (part of its life cycle) which they supply to other researchers for drug development. Vaccine development is what they're aiming for in their future. It will be installed in their lobby. Stacey has a background in Medical Illustration and so this is right up her alley.

IMG_1643

IMG_1643

Its been the perfect way to get back into working again, we have lots to talk about including work, philosophy, and family! And the best part is all I have to do is show up and paint! Stay tuned for photos of the installation. Follow on facebook too!

Happy Accidents

Not everything goes according to plan.  (That should be this year's motto.) With this job I had a major "oops" where the finish I was supposed to do on the ceiling didn't quite turn out as planned.

I had completed the walls last year with a glazed plaster texture and the client wanted to do something on the ceiling that complimented but didn't upstage them.  I also had glazed the trim in her kitchen to match the cabinetry and she wanted to do the same in these rooms too. Normally when I do samples I keep notes and swatches of the different paint colors and mixes that I use. For some reason I didn't do that this time. Don't ask me why. I'm usually good at remembering my process but this time I don't remember what I did. I tried guessing but that didn't quite work. I was about to pull the plug and start over but thankfully my client talked me off the ledge. We came up with a solution that turned out to be even better than the original plan.

IMG_5609

Trim and Wainscotting:IMG_5594

I have to say that normally I would be mortified that the job went south but with a client like this, who is very creative and flexible, was absolutely amazing.

IMG_5631

IMG_5630

Its so hard to capture the subtlety so I pumped up the definition a bit. If you'd like to see the finish in person give me a call, I now have a sample that matches!

IMG_5621

IMG_5608

IMG_5606

The final result is what to me looks like what could be a deteriorated plaster with hints of old wallpaper discoloration on a Parisian apartment salon wall. It has a very subtle crackle with gold peeking though. The colors are all slight variations of taupe, grey, and tan. I am absolutely in love and have tried doing this type of finish several times with no success. I guess you could say it was a happy accident!

I'll show you mine if you show me yours...

I've decided to start a new series where we share our work spaces...I hope to post more photos as people share them with me. If you have some you'd like to share, email me at dee@deelitedesign.com I've always loved exploring how other artists organize and use their space for work and inspiration. I've asked some of my artist friends to share photos of their spaces.  What was so surprising is how embarrassed they were about showing their space! As if a messy studio was a sign of failure! I know when Im working, my space blows up.  After each project I have to reset; clean up, put things away, reorganize. When I'm working I am in the moment. As my mom would call it, it looks like a dumping ground! (Keep in mind, both of my parents are neat freaks so having a mess was a n0-no.) Back when I first started working as an artist, my time was split between my basement and my parents' basement. They had tall ceilings where I could do murals. Nothing is better than being able to leave and shut the door without worrying about who's going to care about my mess!

My studio: in current condition...

me-2

me-2

Storage underneath tables that roll, paints on metal shelves, and storage above for things used less often. On the mural wall, a work in progress. The wall itself has been used as a practice surface for large scale glazing.

me-1

me-1

Ladders and scaffold against the wall, and to the right of the frame, my spray area. Currently being used as storage.

Without further ado, here are some other studios who's owners have graciously allowed us to peer inside. Enjoy!

My neighbors Bill Knapp, billknapparts.com and Barry Sheehan, barrywsheehan.com, who share a space...they are metal sculptors. Each have their own separate businesses but share space.

bill-2

bill-2

Bill

bill-1

bill-1

Bill's area

barry-1

barry-1

Barry working.

My other neighbor, Zach Bowler's studio. He is a ceramic artist. I love what he's done with creating a lounging area in the back.

photo 1-3

photo 1-3

photo 3-1

photo 3-1

My friend Jeanne Shnupp works in Long Island and does decorative painting like me... jeanniesdesigns.com It seems we all have a need for places to store things!

jeanne-2

jeanne-2

jeanne-1

jeanne-1

Arlene McLoughlin's space. She also works in Long Island as a decorative artist. arlenemurals.com

arlene-2

arlene-2

arlene-1

arlene-1

Thanks for sharing your spaces with us!